Given that we now live in a virtual world, it’s fair to assume that you are mentally fatigued from watching the same format of presentations on your Zoom or Microsoft Teams video calls: the monotonous screen-sharing feature and if the presenter is courageous enough to turn on the video, their face in a tiny box somewhere on your screen. For a class I took last semester (Nanobiomaterials), I was tasked to give a 35-minute lecture on a live Microsoft Teams meeting. For this lecture, I thought why not “spice” things up and use a green screen to give the audience the illusion of standing in front of them, and in doing so I can move around and point to objects like a weatherman. The presentation was extremely well received and I was asked by some friends to share how I was able to pull it off. So here’s a short, to the point tutorial on how you can also achieve the same results with little to no effort.
Equipment
- A laptop with a webcam and mic. Either Windows or Mac will work.
- An external monitor. This will allow you to change the slides during your presentation and also see where you are pointing on the green screen.
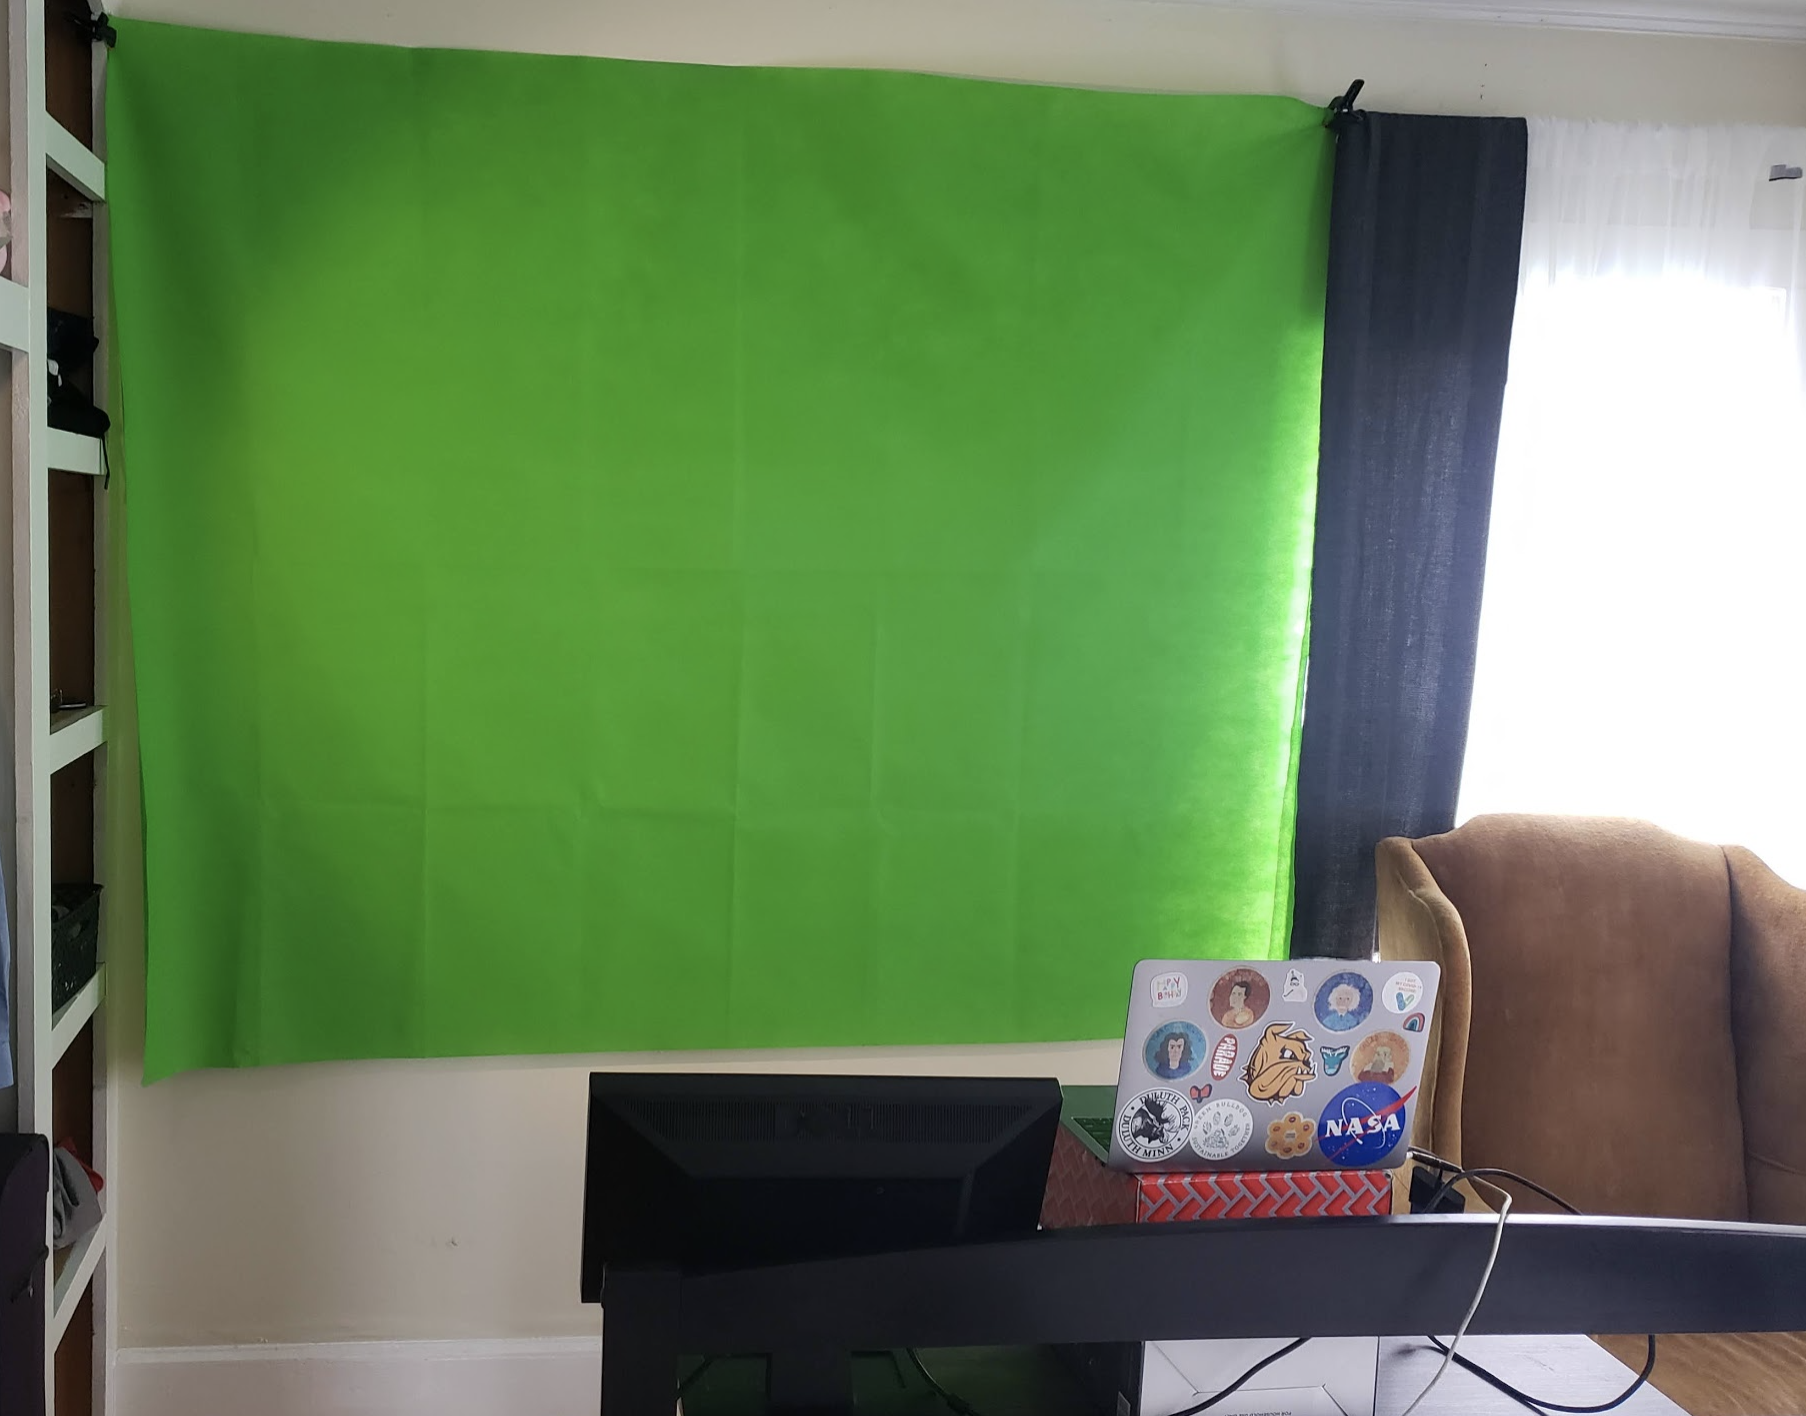
- A green screen. You can either buy one from Amazon for $12 or use a green bedsheet from a fabrics shop.
This is what my setup looked like:
Tutorial
The following steps apply to both Windows/Mac and Zoom/Teams. For Teams, there is one additional step that I will specify.
- Install and open the free OBS software using this link.
- In the “Sources” tab, click on the plus icon and click “Video Capture Device”, click “Create New”, click “Ok” and choose your camera from the dropdown menu.
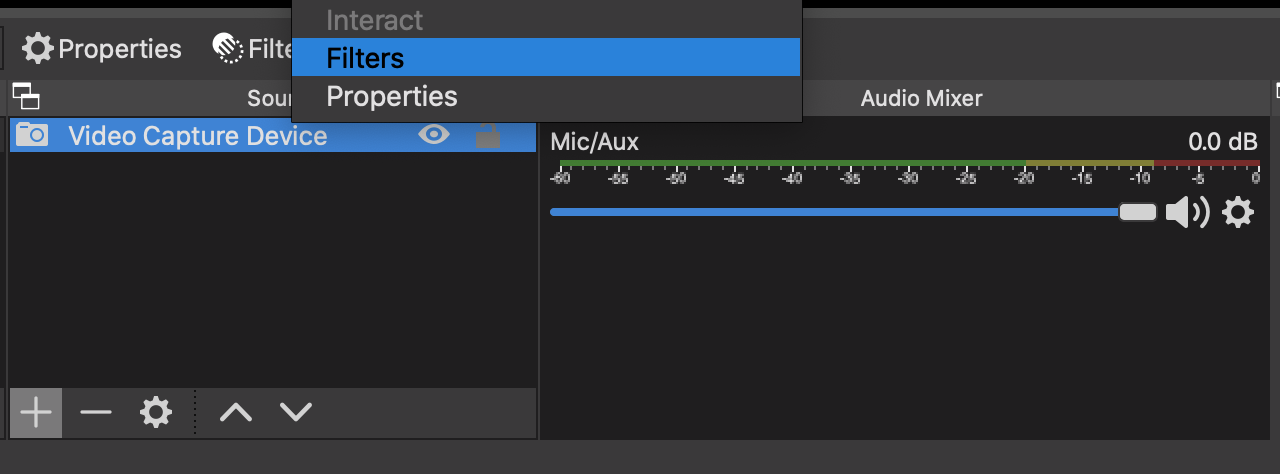
- Right-click the newly created “Video Capture Device” as shown in the photo below and click on “Filters”.

- Under the “Effect Filters” tab, click on the plus icon and click on “Chroma Key”. This is you telling the software that you are using a green screen. Click “Close”.
- Open your Powerpoint or presentation slides in Slideshow mode.
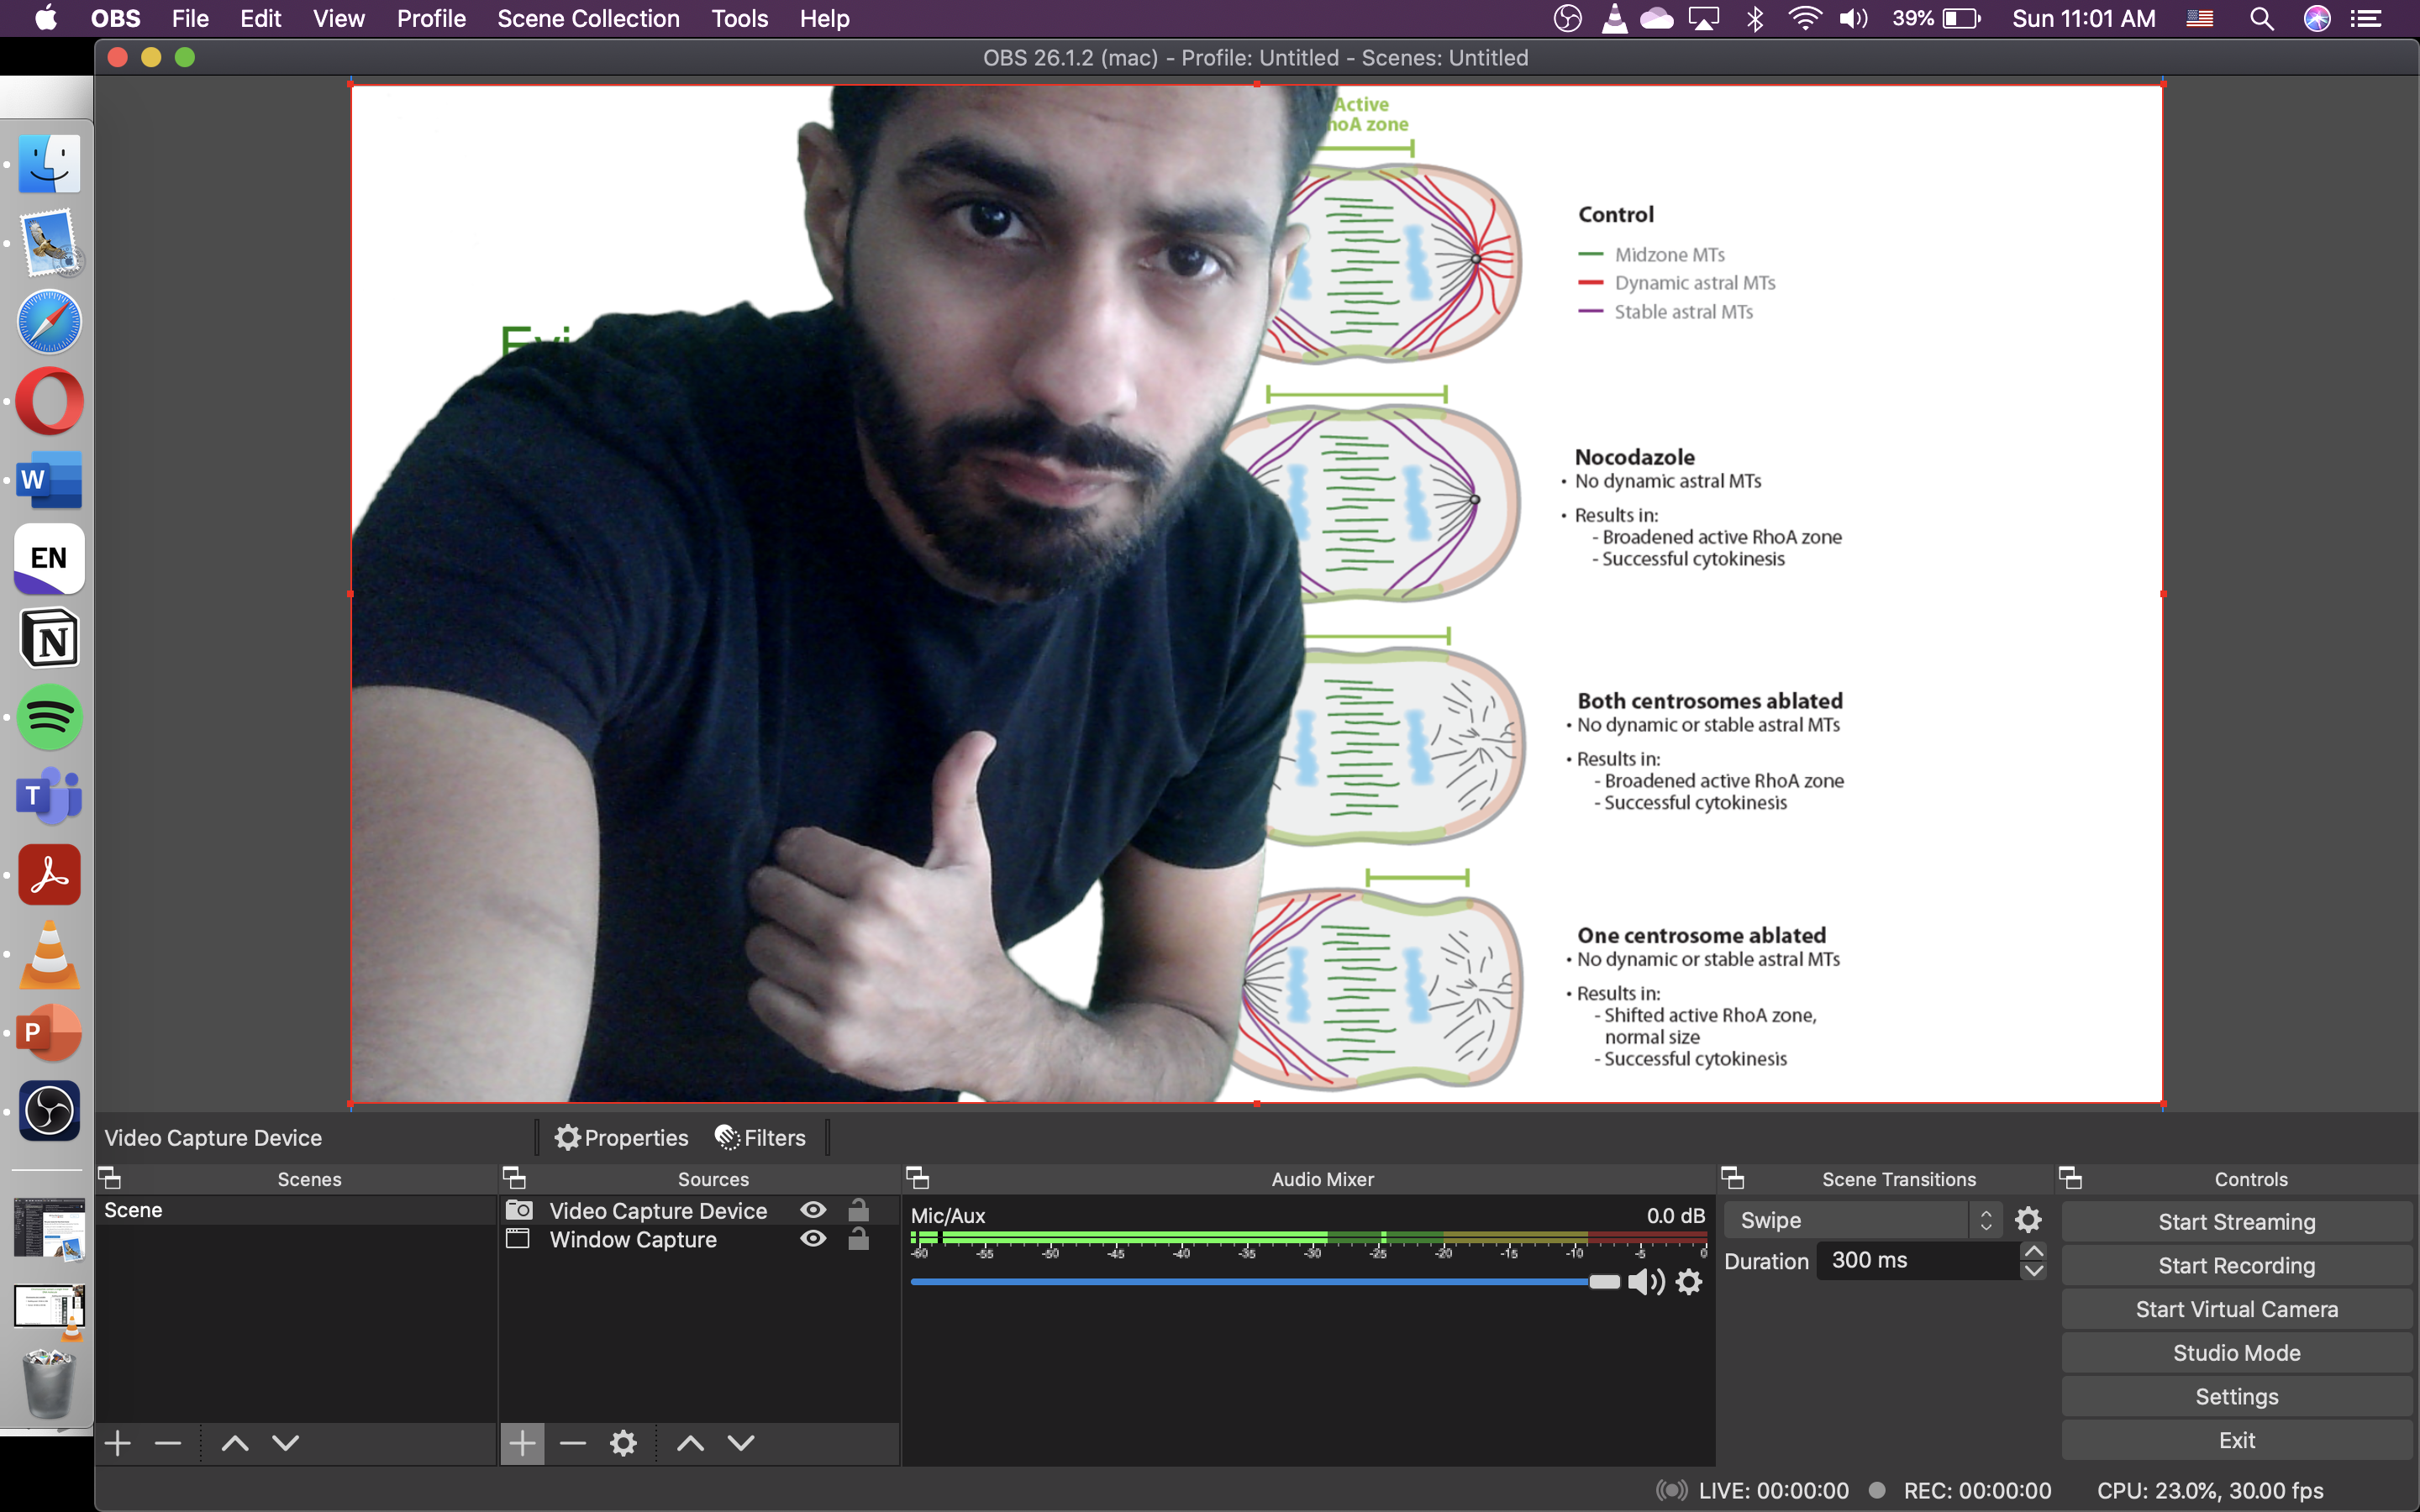
- Go back to OBS and in the main “Sources” tab, click on the plus icon and click “Windows Capture”. Click “Ok” and chose your PowerPoint slide from the dropdown menu. From here you should be able to see your video on top of the PowerPoint slides in OBS like the image below. You can adjust the size and positioning of your video if it is not full screen by dragging the corners.

- In the bottom-right corner, click on “Start Virtual Camera”.
- For Zoom users: Open a Zoom meeting and simply select “OBS Virtual Camera” from the drop-down list of cameras in Zoom. Now your viewers should be able to see you in front of your presentation.
- For Microsoft Teams users: Teams removes the capabilities of using a virtual camera every time it’s updated. To fix this, run the following 4 commands below in a Terminal (Mac users) or in Command Prompt (Windows users). After doing this, restart Teams and you should be able to see the option of “OBS Virtual Camera” in the list of meetings during a video call.
1. sudo codesign –remove-signature “/Applications/Microsoft Teams.app“
2. sudo codesign –remove-signature “/Applications/Microsoft Teams.app/Contents/Frameworks/Microsoft Teams Helper (GPU).app“
3. sudo codesign –remove-signature “/Applications/Microsoft Teams.app/Contents/Frameworks/Microsoft Teams Helper (Plugin).app/“
4. sudo codesign –remove-signature “/Applications/Microsoft Teams.app/Contents/Frameworks/Microsoft Teams Helper (Renderer).app/“
And that’s it! If you have any questions, please feel free to ask them in the comments below. Best of your luck with your (virtual) presentation!
